
Using the Automatic Drywall Taper
Author: LEVEL5 Tools
Publish Date: May 23, 2023
Share this


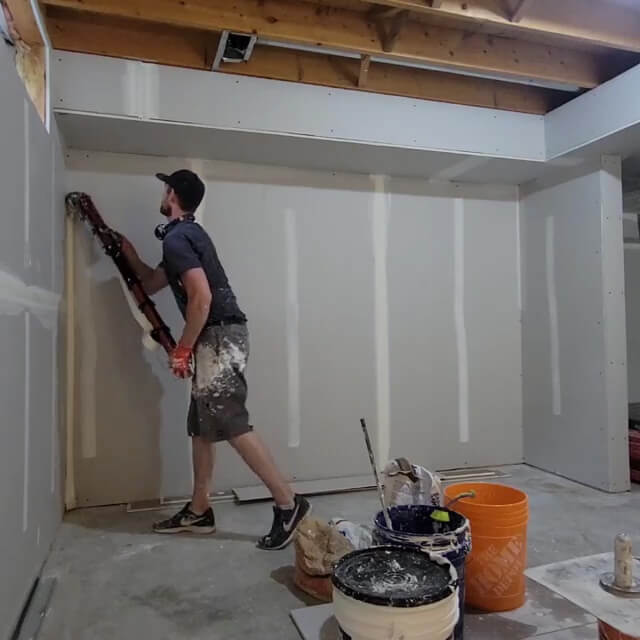
The automatic taper is an essential tool for drywall professionals, as it speeds up the taping process and improves overall efficiency.
To make the most of your automatic taper, it's important to understand which finishing compounds to use, how to practice and adjust your technique, and how to maintain your tool. In this article, we provide practical tips and guidelines to help you master the automatic taper.
Selecting the Right Finishing Compound
When using an automatic taper, we recommend using either general purpose finishing compound or general purpose "lightweight" finishing compound. You can also use "machine mud," which is specifically designed for automatic finishing tools, but it may be more expensive and harder to find. Avoid using durabond or "hot muds," as these fast-setting compounds can harden inside your automatic taper, forcing you to break it down and clean each component manually.
Practising with the Automatic Drywall Taper
Before using the automatic taper on a job, practice using it on scrap drywall or a practice board to familiarize yourself with the following aspects:
- Mud consistency: The mud should be thin enough for the taper to run smoothly along the seam but thick enough for the tape to stay in place on the wall.
- Drive wheel brake setting: Adjust the brake lever so that there's no noticeable resistance and the taper wheel moves smoothly along the seams. There should just be enough friction that the head doesn’t spin backwards when you lift it from wall.
- Tape advancing ("gooser") needle setting: The automatic taper is set up for use with paper tape. If using Fibafuse mesh tape, adjust the advancing needle accordingly to accommodate its additional thickness.
Pro Tips
- Load the head of the automatic taper with compound by spinning the drive wheel against the wall without advancing the tape. This ensures that the tape is fully coated with compound when it advances.
- On flat seams, angle the automatic taper slightly and rock it from one side of the drive wheel to the other to keep the mud and tape in place.
- For inside corner seams, maintain a 45-degree angle with the taper to ensure proper tape centering. Allow for a few extra inches of lead tape to compensate for tape movement.
- Cut the tape 3-4 inches before finishing a seam or corner, then let the remaining tape roll over the drive wheel to end the pass.
Maintenance and Care
Clean your automatic taper thoroughly after each use. When cleaning the inside of the taper, do not force the plunger towards the head by pushing against it with a rod or stick, as it can cause cable damage.
After cleaning, lubricate all moving parts with 3-in-1 machine oil before next use. Avoid using original WD-40, as it can damage gaskets and the plunger.
Minimizing Downtime with an In-Field Repair Kit
Automatic tapers have several small wearable parts that may require replacement. To minimize downtime on the job site, we recommend purchasing an in-field repair kit (#5-815) that includes most of the commonly replaced parts, such as blades, needles, cables, springs, and more.
Share this