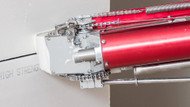
Automatic Taper Drive Dog Replacement
Author: Brendan Rumball
Publish Date: August 16, 2021
In this short video, watch our lead technician Robby Deatherage take you through the simple steps to replacing your automatic drywall taper drive dog. In less than two minutes you will be back to advancing your drywall tape with no issues and dry-patch free!
Replacing the Automatic Taper's Drive Dog
The drive dog is one of the most integral parts of the auto taper and it’s job is to ensure that tape and mud are advancing when they should be.
Step-by-Step Instructions:
1. Remove the cover plate.
2. Push plunger all the way down to fully extend the cable.
3. Locate and loosen the screw holding the drive dog in place [NOT the screw holding the cable in place]
4. Pull the drive dog out.
- Pro Tip: It can be easier to continue if you remove your push rod (opposite to drive dog).
5. Replace it with a new drive dog.
- Pro Tip: Your drive dog has a notch where the screw you loosened will rest on. Make sure that they are lined up when you insert the drive dog and tighten the screw back down.
6. Insert the auto taper push rod back in.
7. Wind the cable back up by rotating the drive dog counterclockwise.
That’s it!
For more tips, tricks and how-tos when it comes to maintaining and repairing your drywall tools, and laying drywall tape like a pro with automatic taping and finishing tools, check out some of the articles below and subscribe to our YouTube Channel.


